Android: Saved Verses (Previously Bookmarks)

When you discover a Bible passage you’ll want to return to again, save it. You can add labels to the passages to make them easier to find. This includes verses you want to remember, verses you want to have with you for a Bible study meeting, and passages you use in a sermon.
View Saved Verses
In the Bible Reader, any verse that you’ve saved will display a Saved Verse Indicator (blue background) on the verse number. This indicator appears when you are using the same Bible version in which the verse was saved. Clicking on the Saved Verse Indicator will display any saved actions you have done in the Saved tab.
To view all your Saved Verses in one convenient list, follow these steps:
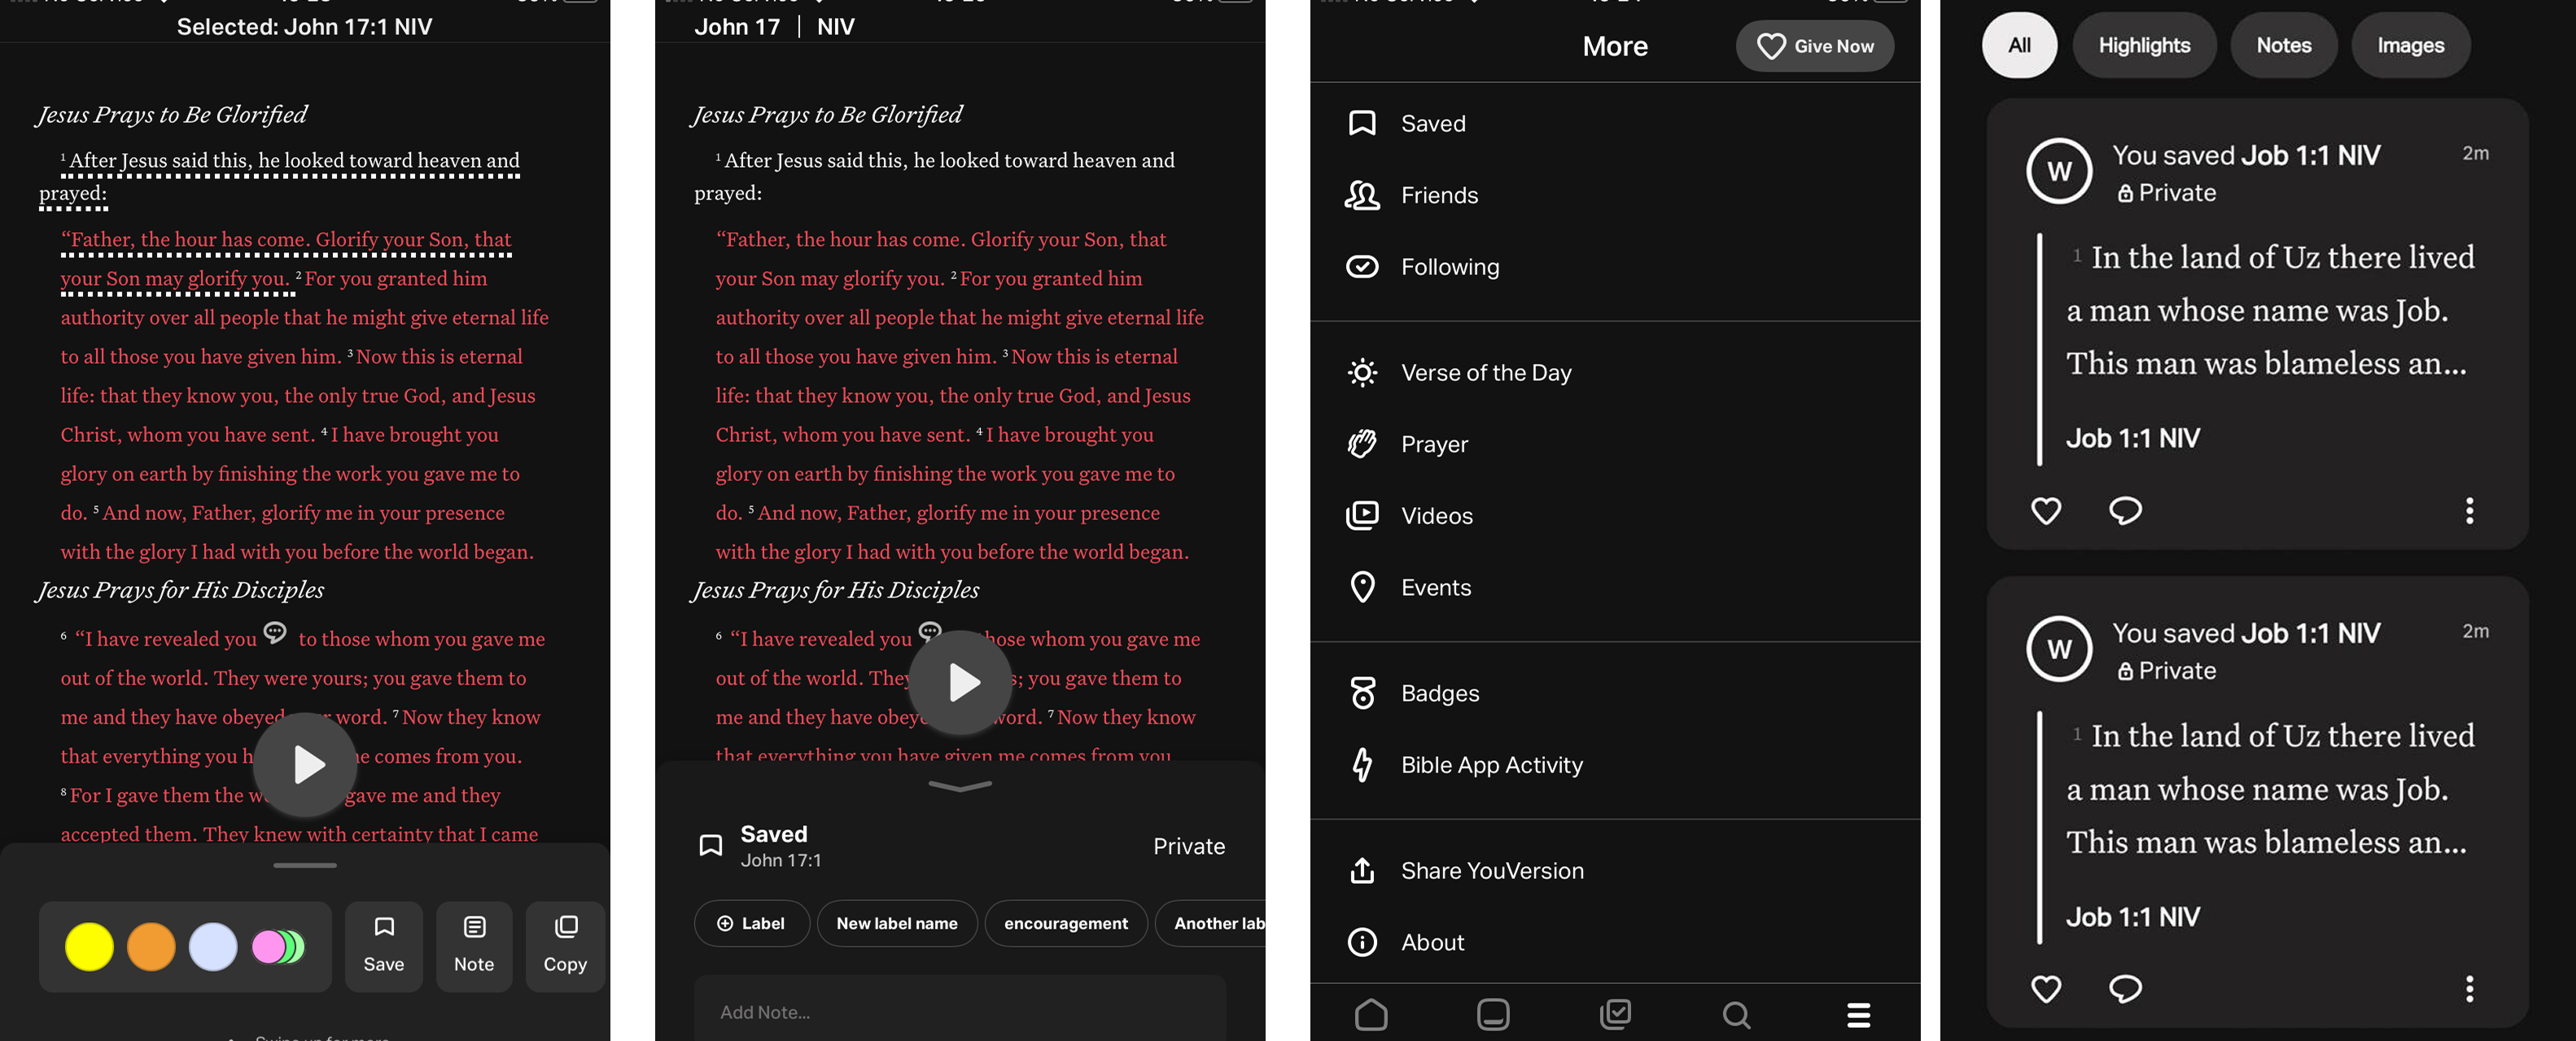
- Select the You tab on the bottom menu.
- Select Saved.
- Select All.Top right: select the label icon, choose a label from the list, then select < Saved to view verses saved with the selected label.
Save a Bible Verse
- Select the Bible tab on the bottom menu.
- Locate the Bible verse(s) you want to save.
- Select each verse you want to save by tapping on it. Dotted underlines will appear beneath the selected verses. A list of options will display: tap Save.
The verse is now saved. Continue the steps below to add colors, labels, change visibility, and more. - Select Private to change who you want to see the saved verse(s): private, friends, public.
- To make your saved verse visible to only Friends or anyone (Public), tap Private and select the desired option. Saved verses are Private by default.
- Add labels.
- Select any labels in the list, or select ⊕ Label to search for/add a new label.You can assign multiple labels to a saved verse.
- Select any labels in the list, or select ⊕ Label to search for/add a new label.
Edit a Saved Verse
- Select the You tab on the bottom menu, then Saved.
- On the All tab, locate the saved verse you want to edit.
- At the bottom right of the saved verse, select ⋮, then Edit.
- Changes are saved as they are made.
Share a Saved Verse
- Select the You tab on the bottom menu, then Save.
- On the All tab, locate the saved verse you want to share.
- At the bottom right of the saved verse, select ⋮, then Share.
Delete a Saved Verse
- Select the You tab on the bottom menu, then Save.
- On the All tab, locate the saved verse you want to remove.
- At the bottom right of the saved verse, select ⋮, then Delete.