iOS - Verse Images

A Verse Image is simply Bible text placed on top of a picture.
Create A Verse Image
- Select the Bible tab on the bottom menu.
- Locate the Bible verse(s) you want to turn into an image.
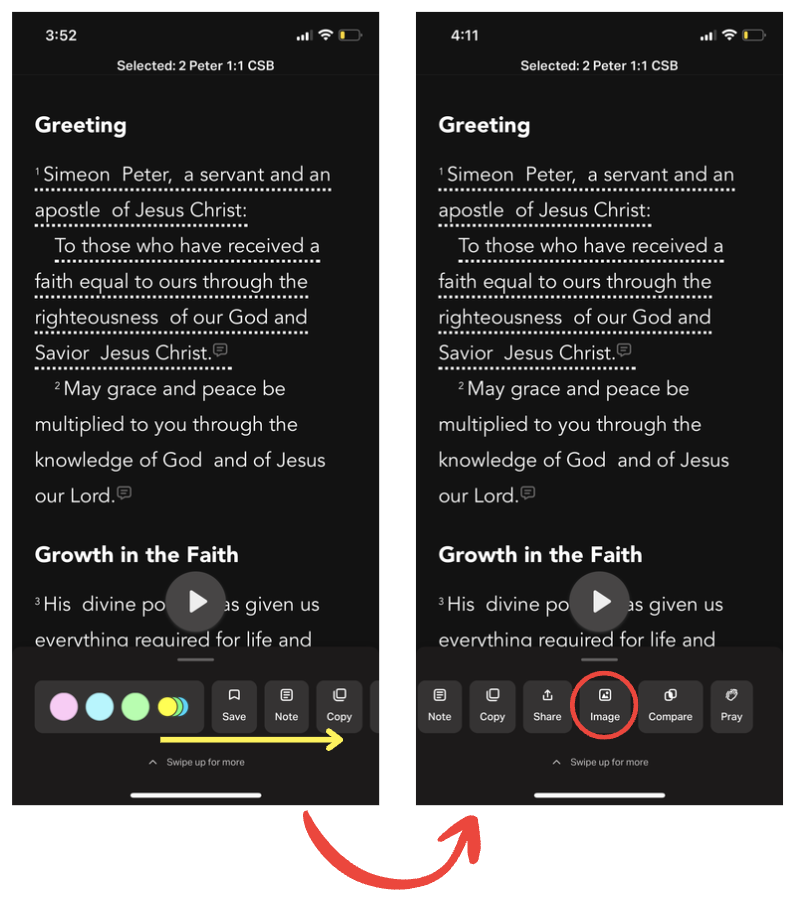
- Select each Bible verse you want in your image. Dotted underlines appear underneath each verse you select. A list of options is displayed.
- Swipe left and select Image from the options.
- Select one of the stock photos or any photo on your device as the background of the Image. To use any photo on your device, select the card with the Select Image icon, locate the photo, and select it.Friends can see images made with stock photos as backgrounds on the Community Feed. However, images made with your photos aren’t visible.
- Bottom: adjust the Settings to make your Verse Image look the way you want it:
- Select a font.
- Adjust the Font Size, Letter Spacing, Line Height, and Text Alignment.
- Select the Shape for your Verse Image.
- Adjust the Opacity of the Bible text.
- Adjust the Blur and Brightness of the background.Tap once inside the text to edit it. Tap anywhere in the background to stop text edit mode.
- To save the image, select Save.
Keep in mind: the more verse(s) you select, the smaller the text will be in your final image.
View Your Verse Images
In the Bible Reader, any verse that you created an image for will display a Saved Verse Indicator (blue background) on the verse number. This indicator appears when you’re using the same Bible version in which the image was saved. Clicking on the Saved Verse Indicator will display any Images you have added in the Saved tab.
To view all your Verse Images in one convenient list, follow these steps:
- Bottom right: Select ≡ (More), Saved, Images. All your images are listed, from newest to oldest.
Delete A Verse Image
- Bottom right: Select ≡ (More), Saved, Images.
- Select ⋯ on the bottom right of the verse image card, then Delete.
To see more on Verse Images, visit this article.