iOS: Highlights

Highlighting marks Bible verses with color, making them stand out from the surrounding text, which helps you easily spot them again later. Highlights are only visible in the Bible versions to which they were added, not in all versions.
How To Create A Highlight
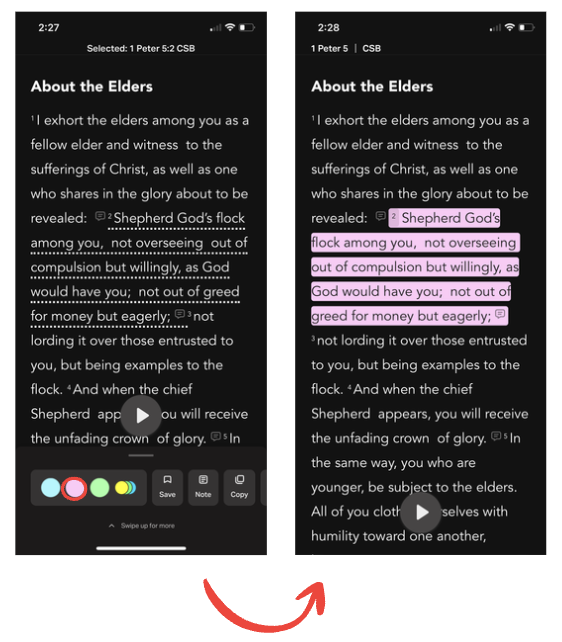
- Select the Bible tab if it hasn’t been selected already.
- Locate and select the Bible verse(s) you want to highlight.Dotted underlines will appear beneath the selected verses. A list of options will display at the bottom.
- Select the color you want for your Highlight.The two recently used colors are highlighted. Tap the button with multiple colors and swipe left to view the five available colors.Anyone on your YouVersion Friends List will see your Highlights activity on their Community feed or when they look at your Profile.
View Your Highlights
In the Bible Reader, any verse that you’ve highlighted will display a Saved Verse Indicator (blue background) on the verse number. This indicator appears when you are using the same Bible version in which the Highlight was created. Clicking on the Saved Verse Indicator will display any Highlights you have added in the Saved tab.
To view all your Highlights in one convenient list, follow these steps:
- Bottom right: select ≡ (More), Saved, Highlights. All your Highlights are listed, from newest to oldest.
Share Highlighted Verse
- Bottom right: select ≡ (More), Saved, Highlights.
- Locate the highlight you want to share.
- At the bottom right of the highlight, select ⋯, then Share.
Change A Highlight To A Different Color
- Bottom right: select ≡ (More), Saved, Highlights.
- Locate the highlight you want to change.
- Bottom right: select ⋯, Edit.
Remove A Highlight
- Bottom right: select ≡ (More), Saved, Highlights.
- Locate the highlight you want to remove.
- At the bottom right of the highlight, select ⋯, then Delete.